
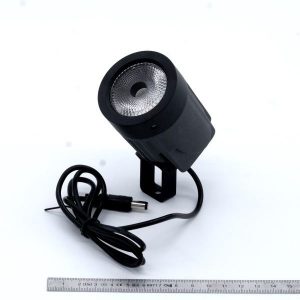
Introduction #
Thank you for purchasing an Electroconcept product.
Please read carefully the following guide before using DMX HF LED 10 W RGBW Pinspot.
Responsibility:
Electroconcept can’t be held responsible for any damage caused by a misuse of any kind such as loss of utilizing, consumable destruction (tapes, CDs, LED Strips, etc.) or any other financial loss due to an inappropriate use of our products or any impossibility to use them; so as any wiring mistake during the installation.
Guarantee:
Electroconcept products benefit from a two years manufacturer guarantee (electronic components only, except consumable ones e.g plastic components). The product must be returned to Electroconcept postage paid and in its original package. If not, the package will be refused and returned to sender. Electroconcept company is in charge of the product restitution.
Are excluded of the guarantee benefits the followings : any damage caused by carelessness, mistake, lack of maintenance by the user (broken, burned, heated, soaked, silted up, etc.); wrong installation or misuse by the user.
All our products are tested before sending to buyers. Modifications of any kind are at your own risk and out of guarantee benefits.
Technical specifications #
- Power supply : DC + 3,5 V to + 16 V
- Dimensions : 85 mm x 55 mm (connectors excluded)
- LED RGBW 4×2,5 W
- APWM Output frequency of about 32 KHz with a possible gamma correction
DMX address and fixtures settings #
DMX address settings #
DMX address and ID universe settings are configured using the DMX HF transmitter. Go to the Assignment menu on your emitter.
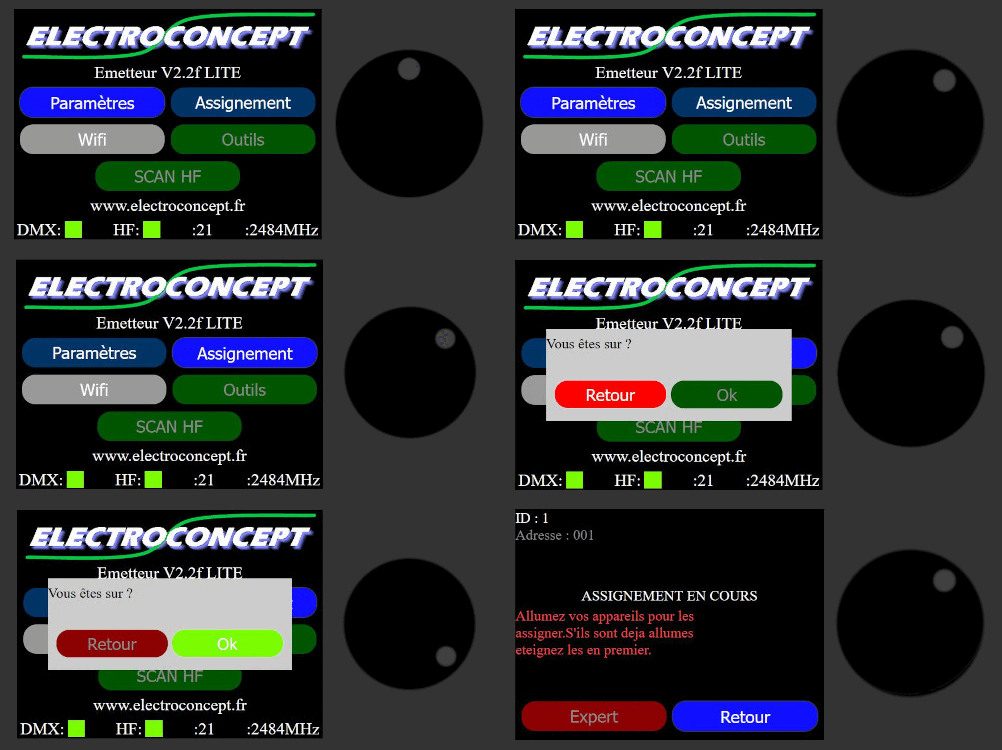
- Connect the transmitter electrically with its USB cable, ensuring that the antenna is also screwed onto the device;
- Go to the Assignment menu on your emitter, select the ID of your HF DMX universe and the DMX address if necessary for your HF DMX receivers.;
- To select the desired universe and address, move around the screen using the directional wheel and press the highlighted name, then turn the wheel to the value you want to set up, press the wheel to confirm your choice and exit the value you are editing to edit another one;
- Once you have selected the universe and address at the top of the screen, remain in this menu and switch on your Pinspot. The antenna icon with the message ‘assignment in progress’ will flash slowly;
- The Pinspot flashes red quickly to confirm that it has received the assignment information;
- Once the assignment has been completed, to verify that the information has been received, test your equipment.
IMPORTANT: when assigning your devices to a different ID universe than the default one, i.e. ID universe 1, remember to also change the ID universe of the emitter, otherwise there will be no connection between the emitter and your entire DMX HF device.
Modes #
In Assignment menu in Expert mode, it is possible to choose “DMX mode” between 0 and 4.
Settings description in expert mode:
Param0: Red starting level
Param1: Green starting level
Param2: Blue starting level
Param3: White starting level
Param4: Level of colors change smoothing. 0: none; 8: strongest.
Colour change smoothing allows color transitions to be smoothed with over 1,000 interpolations per second.
DMW channels description for modes 0 and 1:
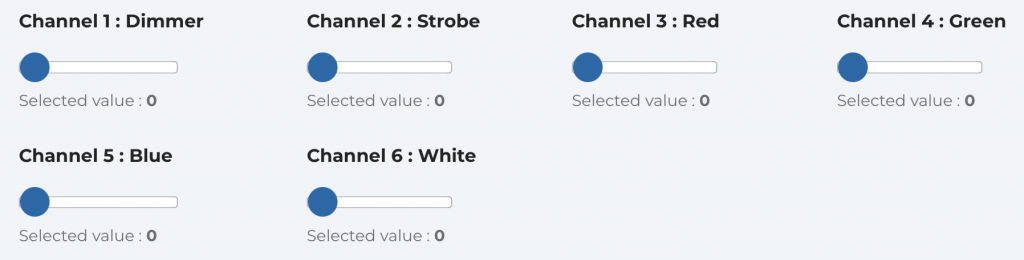
Mode 0 features an Output with gamma correction.
Mode 1 fearures a linear Output.
DMX channels description for modes 2 and 3:

Mode 2 features an Output with gamma correction.
Mode 3 features a linear output.
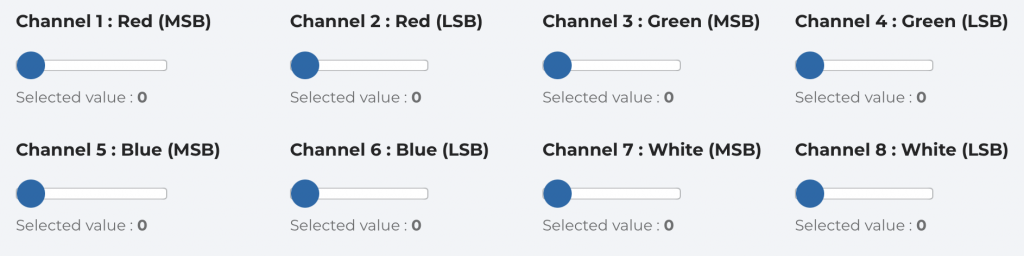
DMX channels description for mode 4:
Each Output setting is in 2 channels, first channel is for MSB and second channel is for LSB.
Usage #
When you switch on your device, the Pinspot scans the frequencies to find the transmitter to which it is assigned.
If the DMX address and universe ID you have assigned to your Pinspot match those on which you are transmitting, you can now use your Pinspot.


