
Introduction #
Thank you for purchasing an Electroconcept product.
Please read carefully the following guide before using Repeater V1.
Responsibility:
Electroconcept can’t be held responsible for any damage caused by a misuse of any kind such as loss of utilizing, consumable destruction (tapes, CDs, LED Strips, etc.) or any other financial loss due to an inappropriate use of our products or any impossibility to use them; so as any wiring mistake during the installation.
Guarantee:
Electroconcept products benefit from a two years manufacturer guarantee (electronic components only, except consumable ones e.g plastic components). The product must be returned to Electroconcept postage paid and in its original package. If not, the package will be refused and returned to sender. Electroconcept company is in charge of the product restitution.
Are excluded of the guarantee benefits the followings : any damage caused by carelessness, mistake, lack of maintenance by the user (broken, burned, heated, soaked, silted up, etc.); wrong installation or misuse by the user.
All our products are tested before sending to buyers. Modifications of any kind are at your own risk and out of guarantee benefits.
Technical specifications #
- Power supply: 110 V AC to 240 V AC or 50 – 60 Hz
- Consumption: 150 mA – 200 mA (according to the number of DMX devices connected)
- Dimensions: 120 mm x 70 mm x 40 mm
- HF power: 2,4 GHz, 100 mW in peak, 50 mW continuous
- 3 possible modes: simple DMX receiver, receiver and repeater on the same frequency, receiver and repeater on a different frequency (frequency shift).
- Compatible protocols: W2.4EC-DMX-A and B
Information #
Using HF Electroconcept products does not change how to use your DMX devices.
The technology used in this product ensures complete transparency between your devices.
For each HF universe, all 512 channels are sent. Frame synchronisation ensures there is no latency between the emitter and the receiver.
Each repeater has a memory that allows it to send back the last value received if there is a loss of HF connection.
All your products that use built-in receivers can also be used with a wired connection.
The range depends on the environment, approximately 30 m in a hostile environment (between thick walls, for example) and approximately 600 m outdoors.
Installation #
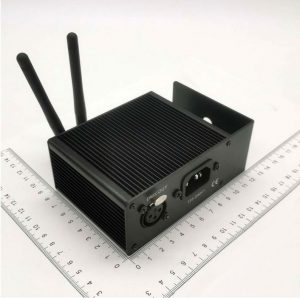
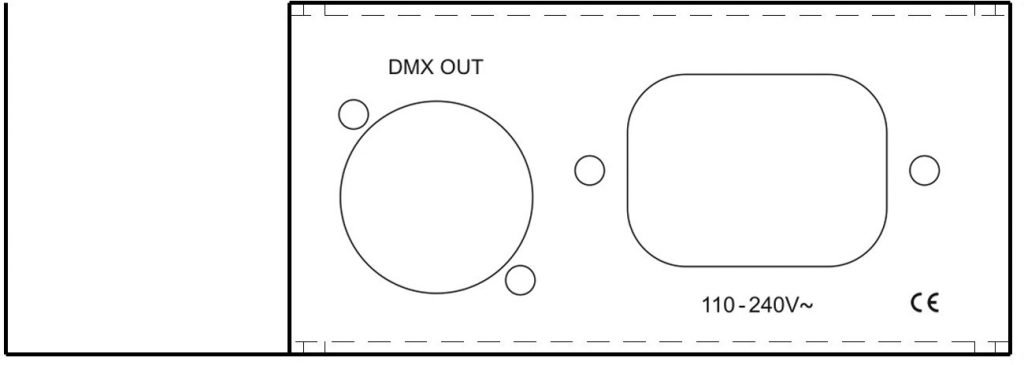
Connect the repeater to the mains using the power cord.
When an HF transmission is detected, any DMX product connected to the XLR Output can be used normally.
Modes #
Mode 1: simple DMX receiver.
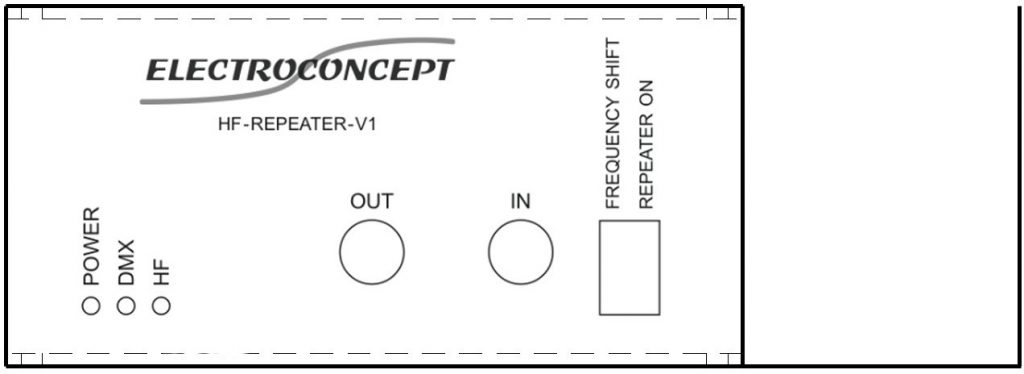
Dip Switch buttons must be switched on OFF. It is the simple DMX mode.
No signal is sent on the OUT antenna. IN antenna must be connected.
Mode 2: receiver and repeater on the same frequency.
Dip Switch button 1, FREQ SHIFT, must be set to OFF and button 2, REPEATER ON, must be set to ON.
In this mode, in addition to the receiver mode, the signal is repeated on the OUT Output.
IN and OUT antennas must be connected.
HF signal is repeated on the same received frequency. This mode is limited to one repeater only.
Indeed, if the receiver moves and loses the emitter’s frequency, given that the repeater transmits on the same frequency, no frequency scan will be performed. So the transmission will be transparent.
For example, if the emitter sends a DMX signal on frequency 5, it will also be repeated on frequency 5. This mode uses the available digital bandwidth and is very useful for mobile applications.
Indeed, if the receiver moves and loses the emitter’s frequency, given that the repeater transmits on the same frequency, no frequency scan will be performed. Therefore, transmission will be transparent.
Mode 3: receiver and repeater on a different frequency (frequency shift).
Both buttons on the Dip Switch are set to ON.
This mode is identical to mode 2 except for the frequency.
A frequency jump is performed. This mode is useful when we want to use multiple repeaters.
The new frequency is then frequency received + 1. If the received frequency is 31, the new frequency will be frequency 1.
CAUTION: if you use multiple repeaters, only one repeater can use mode 2. The other repeaters must absolutely be set to mode 3 to avoid digital feedbacks.
LED colors reading:
- If there is no DMX signal, only the blue Power LED is switched on;
- If a DMX signal is detected, the blue Power LED is running;
- DMX green LED is quickly flashing and the red HF LED is switched on continuously.
Usage #
The V1 repeater is assigned by default to ID universe 1.
To assign it to another ID universe, use the emitter’s assignment mode by following the steps described below.
- Connect the emitter electrically with its USB cable, ensuring that the antenna is also screwed onto the device;
- Go to your emitter’s Assignment menu, select the ID of your HF DMX universe and the DMX address if necessary for the repeater;
- To select the desired universe and address, navigate the screen using the directional wheel and press the highlighted name, then turn the wheel to the value you want to set, press the wheel to confirm your choice and exit the value you are editing to edit another one;
- Once the universe and address have been selected at the top of the screen, remain in this menu and switch on your repeater. The antenna icon with the message “assignment in progress” will flash slowly;
- The LED on the repeater will flash 5 times quickly to confirm that it has received the assignment information, then flash slowly while searching for a HF DMX signal;
- Once the assignment is complete, perform a transmission test to check that the information has been received.


